Saturday 31 March 2012

Mousse au chocolat a l’orange recipe


As a result of not consuming enough Swiss chocolate during my week in Geneva, I brought a substantial amount home in my suitcase. As a treat for Kristoph I used it to make an orange infused chocolate mousse.
Given this was my first attempt at making mousse, I thought I’d be wise to take my lessons from the masters. 

So I followed one of David Lebovitz’ recipes, who adapted his recipe from Julia Child’s classic: Mastering the Art of French Cooking .

Not desiring a boozy mousse, I left out the rum and instead infused the dark chocolate with an orange syrup which gave the mousse a lovely zesty zing.

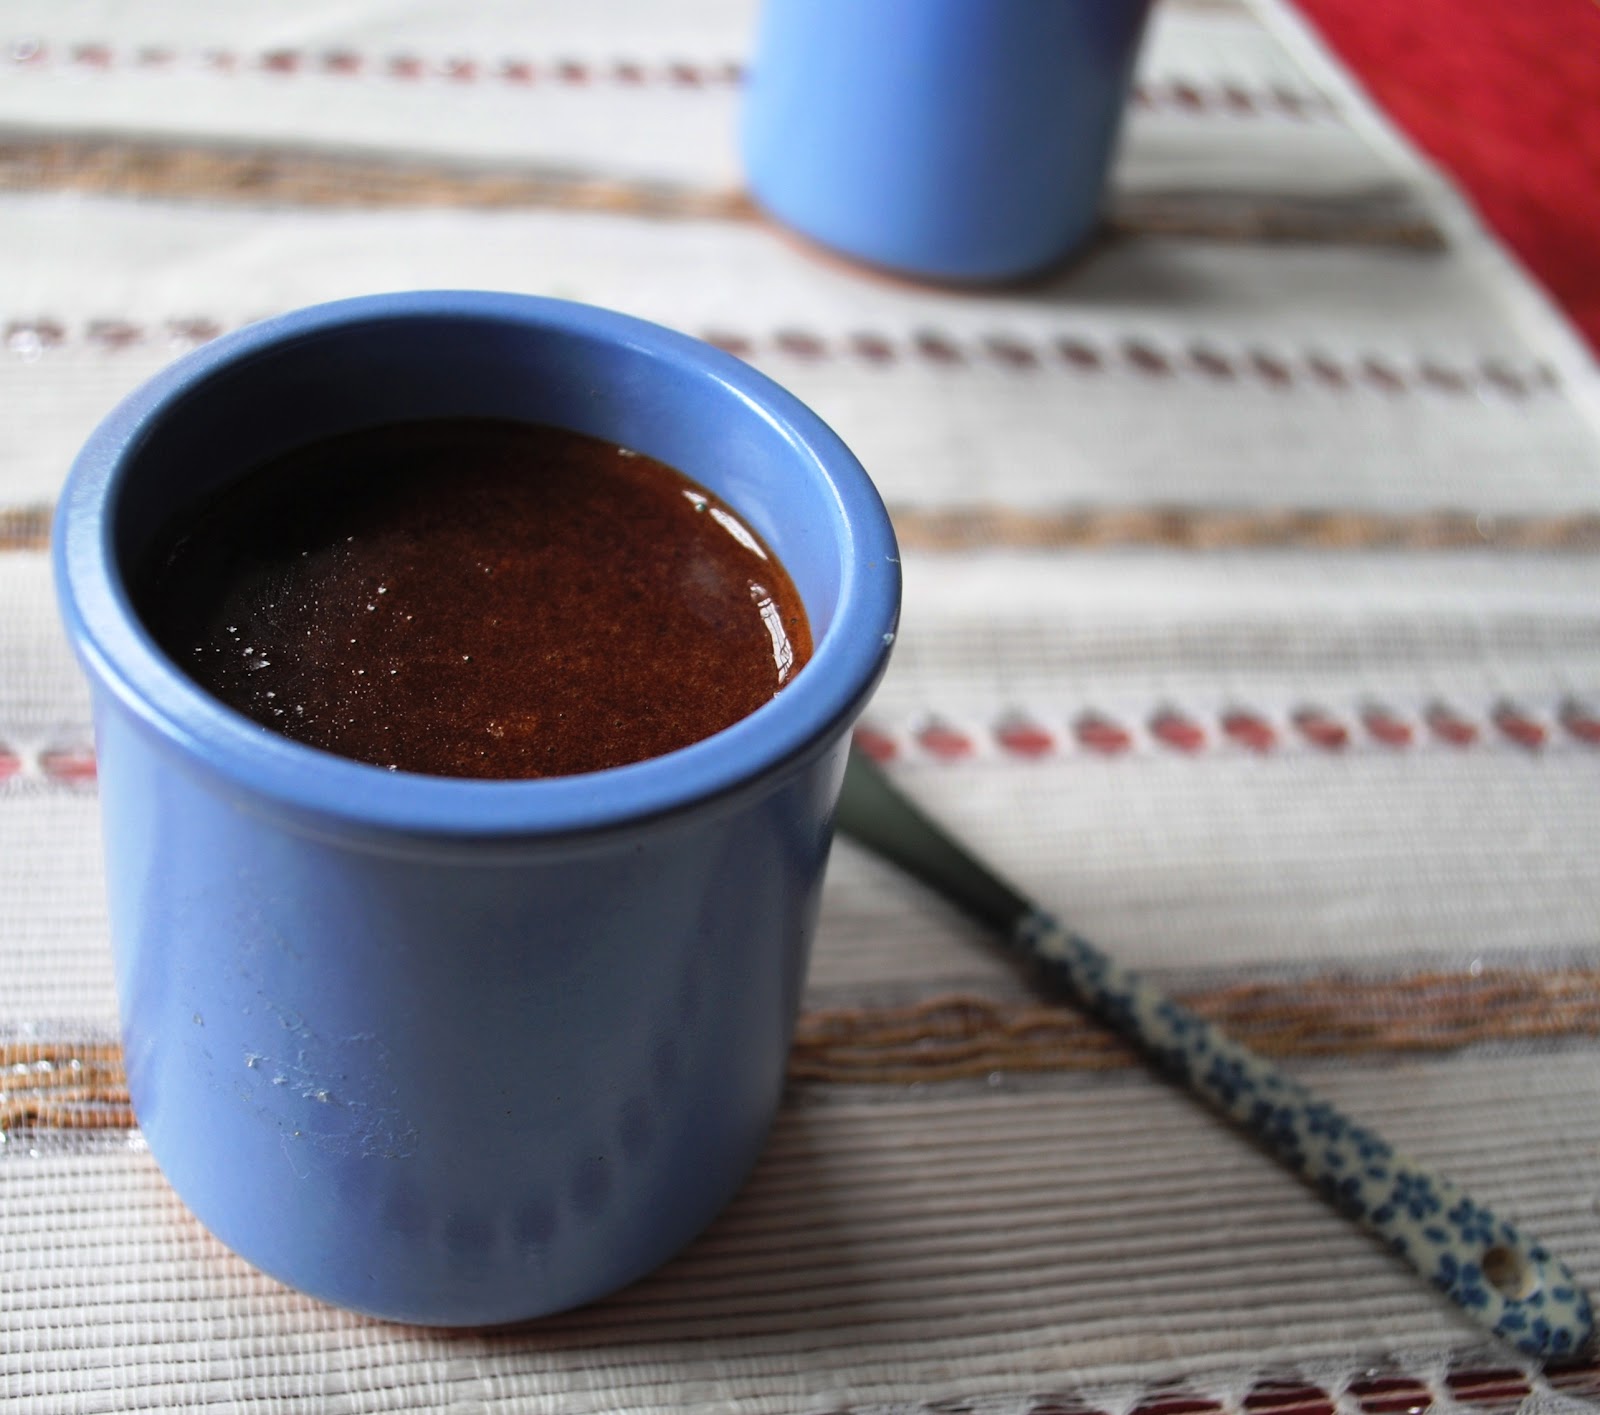
I made my mousse in small ceramic ramekins, in the vein hope of promoting portion control in our house. It didn’t work. Feel free to use any size ramekins you have. I’ve included below both the orange syrup recipe as well as the mousse. You’ll have some orange syrup left over. Decant into a small bottle or jar and keep in the fridge to add to soda water, or to mix with cocktails. You can also make the mousse without the orange syrup addition. 

For the mousse keep in mind you’ll need three separate medium sized bowls. Make sure you have them before you start. Here’s the recipes.  
Recipe:
(orange syrup)
Peel of one orange, cut into strips
¾ cup of sugar
2 cups of water


Step One: Boil the water in a pot. Once the water is boiling add the orange peel. Simmer for 20 minutes. 


Step Two: Strain the orange peel, and return the liquid to the boil. Stir in the sugar until it dissolves.

Step Three: Remove from the heat, cool, and decant into a small bottle or jar.


Recipe:
180 grams dark chocolate chopped (at least 70% cocoa solids)
170 grams unsalted butter, cubed
60mL dark-brewed coffee
4 large eggs, separated
170 grams brown sugar
5 table spoons orange syrup
1 tablespoon water
Pinch salt
½ a vanilla pod


Step One: Melt the chocolate by making a double boiler. Ie Fill to 1/3 with water, a medium sized saucepan. Put a bowl on top and melt the chocolate and butter. Add the coffee and stir over a simmering heat until the mixture is smooth. 


Step Two: In another bowl, whisk the egg yolks, 2/3 cup of sugar, orange syrup, and water, over the simmering saucepan, until the mixture reaches the consistency of runny mayonnaise.

Step Three: Remove the bowl from the heat and nest it in a bowl of ice water. Beat until cool and thick, then fold the chocolate mixture into the egg yolks.

Step Four: In another bowl, beat the egg whites together with the pinch of salt until they are frothy, and continue until they hold their shape. Add a tablespoon of sugar and the seeds of the vanilla pod. Continue to beat until the mixture is thick and shiny.


Step Five: Fold the beaten egg whites into the chocolate mixture until it is just incorporated. Do not over mix or the mousse will lose all of the volume you have created through beating and whipping.

Step Six: Transfer into a serving bowl, or ramekins and refrigerate until firm (around 4 hours). 

 
Note – if you don’t eat it all after four hours, it will last up to four days.

Tuesday 27 March 2012

Delicious Caramelised Onion Chutney Recipe


I’m back! Finally..... :) I’ve just returned from a busy week of meetings in Geneva. I meant to share this delicious onion chutney recipe while I was away, but alas I was distracted by all things Spring-like and gorgeous surrounding Lac Léman. Think chirping birds. Picture clear views of the French Alps beyond, blossoming Magnolia trees (which always stop me dead in my tracks), thousands of pert daffodils, green grassy carpets dotted with jewell-coloured crocuses, and all this while the cafe at Bain des Paquis still considers it fondue season! 

Some evenings there really is nothing better than melted cheese, bread, mint tea, and good conversation in the middle of the lake. This onion chutney may not give you that warm “cheese ball in the stomach” feeling that fondue does, but it’s a whole lot healthier. It’s rich, but you only need a little, and it works with nearly everything. We’ve been smearing it on crackers with soft and hard cheeses, topping salads and wafer thin pizza bases with it, adding a little extra flavour to steamed greens, and to be honest we’re nearly out of it. Down to the final tasty morsels of our last jar, three jars was nowhere near enough.

So if you’ve got the onions, and the gumption for chopping them, I’d recommend doubling or even tripling this recipe. This is very simple recipe, and once bottled in labelled jars makes a great gift, that is, if you don’t eat it all first. Here’s the recipe, it makes three small jars.

Recipe:
8 medium sized onions sliced
1 ½ cups brown sugar
1 cup apple cider vinegar
½ cup balsamic vinegar
20 peppercorns (any colour/type) ground
3 table spoons wholegrain mustard
Dash olive oil

Step 1: In a preserving pan, or large heavy bottomed pot, heat a dash of olive oil and then add the onions. Brown them slowly over a medium heat. 


Step 2: Add the sugar, mustard, ground peppercorns, and the vinegars. Bring to the boil, then turn down and simmer for 90 minutes. 


Step 3: Remove from heat and spoon into sterilised jars, seal and label.  Et voila, enjoy!


And here's a couple more pics from Geneva!


Thursday 15 March 2012

Kale and caramelized onion recipe

 
Warning: this is another super healthy post from Segur. This dish is delicious, I promise, but I realise I’ve posted two very green and healthy dishes sequentially, and for some of you that might be a little too much. So if you are looking for a sweet treat instead, perhaps try these blondies, or these muffins. But, if you fancy a hearty, simple earthy dish, with creamy and sweet elements, then this might just be for you.

So, a little background on this post - I’ve had a couple of kilograms of brown onions sitting in our kitchen for the last few weeks. I’ve been meaning to make caramelized onion chutney, to continue my preserving experiments, with my new preserving pan. But as is often the way, I seem to be continually distracted by other projects and activities. But I decided today was the day and the chutney, which I’ll post about in the next couple of days. Once it's finished simmering away, and slowly reducing on the stove.

As I was caramelizing onions anyway, I decided to put together a healthy lunch using some of the onions and a bunch of organic kale, which has been sitting in the fridge for a few days. I often steam kale, and toss it with soy, garlic and ginger. But today I thought I’d honour its Tuscan roots and go for a slightly richer dish. I added a couple of handfuls of chopped kale to oil in the frying pan and tossed it around a little. I then dropped in a couple of tablespoons of the caramelized onions and fried it off a little further, allowing the kale to soften and morph into an even brighter green. I added a little Turkish feta that was in the fridge, which finished the dish off with a rich creamy, slightly salty kick.

This is a really simple dish, and makes a fantastic midweek lunch. It would also be lovely served as a side dish, for dinner. You can also caramelize additional onions and they’ll keep in the fridge for at least a week. They are great on pizzas, or stirred into pasta. Here’s the recipe:

Recipe
(Serves one, scale up as required)
One onion (sliced)
Two large handfuls roughly chopped kale (any variety will do)
Dash of balsamic vinegar
30 grams feta, or any hard, crumbly cheese (a hard goat would also work)
Olive oil

Step One: Add the sliced onion to a pan, with a dash of oil. Move the onion around with a wooden spoon, allowing it to cook through and caramelize. After a few minutes add a dash of balsamic vinegar to the onion and fry it off a little more. You know the onion is caramelized when the colour has darkened. Set aside.


Step Two: Heat a dash of olive oil in a pan. Drop in the kale and toss. The colour will intensify quite quickly. When it does, stir through the onion, and toss again. Remove from heat, and crumble in the feta to serve. Enjoy!


Tuesday 13 March 2012

Super healthy Romanesco salad recipe


A few days ago, I was lucky enough to come across a lovely head of Romanensco at a local market. An Italian vegetable by origin, it seems someone has an eye for its sculptural and slightly futuristic beauty, or perhaps it’s subtly nutty flavour, here in France.

Apparently Romanesco, a member of the Brassica family of vegetables, which also includes broccoli, cauliflower and cabbage, was developed through selective cultivation in 16th century Italy. Appearance wise, it may well be the most stunning vegetable you ever meet. Its strong geometric form and lime-green colouring must have appeared as otherworldly 500 years ago, as it does today.    

The Romanesco is made up of intricate, repetitive swirls. Each floret is comprised of countless smaller conical florets. The incredibly symmetrical fractal pattern, is described by mathematicians as logarithmic, by Creationists as evidence of “God’s great work” despite it being recorded historically as a cultivated variety, and by gardeners and chefs alike quite simply, as beautiful.      

As well as being gorgeous to look at Romanesco is packed with nutrients, and easy to prepare. You can eat it raw, with hummus, or steam it for a few minutes as I did. It’s got a sweet creamy and slightly flavour. This recipe with a simple dressing, fresh goats cheese and sundried tomatoes, is simple, and allows the full taste of the Romanesco to shine through. I hope you like it!

Recipe
(serves two as a main dish)
One head of Romanesco
10 chopped sundried tomatoes (chopped)
 2 tablespoons chopped/crumbled Fromage Frais (or soft goats cheese)
Three table spoons olive oil
Juice of one lemon
Two tea spoons wholegrain mustard
Ground black pepper


Step One: Chop the Romanesco into florets and steam until al dente.


Step Two: Mix the olive oil, lemon juice, mustard and some ground black pepper in a jar. Put the lid on and give it a good shake.

Step 3: In a large bowl mix the Romanesco, sundried tomatoes, fromage frais and dressing. Serve warm, or at room temperature. 


Sunday 11 March 2012

Five-minute white chocolate and cranberry blondie recipe


I preface this post about quick-to-make blondies, with the statement: I love slow food. And I am committed to bringing more slow food into my life. But yesterday was not a day for slow food. The sun was shining and I wanted to take advantage of that fully, and, slowly. I spent my day watching old French men trundle past my kitchen window, in waders, carrying fishing poles, and small leather fish purses. This procession of khaki attire marked the opening of the fishing season.

I followed them to the bridge and watched them cast their lines in the river. Standing, patiently for hours, the scene was reminiscent of the film a River Runs Through, sans the young, fresh-faced Brad Pitt. In the stunning film, fly fishing is not officially a religion, but it is a serious spiritual path for certain men. I stood on the bridge near the old mill, and watched the eight French men standing quietly in different parts of the shallow river, waiting patiently for trout. The trout weren’t rising, but the men appeared happy enough, pointing their crinkled noses up, and squiting towards the bright mid-morning sunshine.  

Returning home I got to thinking about baking a quick snack. My friend across the river, the Comptesse, who I wrote about here, makes blondies. Like her salad dressing, the blondies are much praised, and also like her salad dressing, the recipe remains a guarded secret. But I had a hunch blondies could be a one bowl event, such is the Comptesse’s preference for simple foods. She prefers to spend her days outside answering the call of her extensive garden, and stores mail in her oven.

I found this at Simply Recipes. I used this as a base, but made a few tweaks. These sweet treats are incredibly quick and simple to make, and the result is sweet and chewy. As I assumed, all of the ingredients can be mixed into one large bowl with the help of a whisk and a spatula. There’s absolutely nothing fancy (or particularly healthy) about them. They are quick to mix, take 20 minutes to bake, and taste delicious. I added dried cranberries and white chocolate, which provide a contrasting sweetness and tartness to the blondie, not to mention jewel-like bright fuscia inclusions – I do love colourful food. You could also experiment with any combination of nuts, dried fruit, or chocolate.

Recipe
1 and 1/2 cups of all-purpose flour
1/2 cup of melted butter, melted
1 cup of dark brown sugar
1/2 cup of chopped white chocolate
2/3 cup dried cranberries
1 egg
1 vanilla pod
 1/2 teaspoon baking powder
Pinch of salt

Step One: Preheat the oven to 180C. Lightly butter the pan. I used individual tins, but you could use a medium size tin. 

Step Two: Whisk together the melted butter and sugar in a large bowl. Then add the egg and the contents of the vanilla pod. Continue whisking.

Step Three: Add the sifted flour, baking soda, baking powder, and salt, mix it all together. Add the cranberries and chopped white chocolate.

Step Four: Pour into the pan, or muffin tin. Bake for 20 minutes, or until a toothpick comes out clean. Allow to cool before serving.


And here's a couple of pictures of the trout fisherman and the river yesterday. Enjoy!


Friday 9 March 2012

Quick Mustard and Chevre Scrambled Eggs Recipe


Today one of those perfect mornings dawned in Ségur le Château. I awoke to the sound of birdsong in my ears. With my eyes still closed, their happy melodies made me wonder, if perhaps they were chirping at the sun. Opening my eyes, I saw a bright blue sky and the sunshine illuminating the roof tops and chimney stacks outside my window, bathing everything in perfect, bright light.

Before breakfast I strolled around the village, armed with my camera, admiring the power of sunshine and a bright blue sky to transform the grey stone. The sunshine shed new light on old architectural details, encouraged tiny snowdrops to emerge from the leaf litter, and seems to have polished our little river, l’Auvezere, so that it sparkled like a jewel.   

I’m in Ségur alone this week, with Kristoph busy with projects in London. Cooking meals for one isn’t my favourite pass-time. I thrive on interaction, feedback and conversation. I love to cook for others and share meals. When I’m alone I tend to opt for very simple dishes. I also revert to all sorts of bad habits, skipping a few meals here and there. My inner rebel (without a cause or applause) rears her head, and I eat snacks instead of meals. Strangely our household yoghurt consumption also doubles when I’m here alone. Correlation doesn’t necessarily equate to causation, but I do wonder what that is about...

But I’m attempting to change those old habits, and consume decent, nutritious meals, even as a party of one. Last night’s mustard scrambled eggs were a surprise success. One of those meals I threw together off the back of quick thought that I needed to eat some protein. I chopped some lovely green onions from the epicierie around the corner, whisked up my eggs, dropped in a dollop of wholegrain mustard, and some fromage frais. Et voila, the result was a very tasty scrambled egg dish. So tasty, I made it again for brunch this morning and thought I’d share it. The recipe is below, but first, here are a couple of pictures I took on my morning walk.          


Recipe:
(Serves one, scale up as needed)
Two Green onions finely chopped
1 tea spoon whole grain mustard
2 free range eggs
Dash of milk
1 tablespoon fromage frais
Toast, to serve

 
Step One: In a pan, fry off the onions. 

Step Two: While the onoins are frying whisk the eggs, milk and mustard. Then add the fromage frais. Whisk again, but allow the fromage frais to stay in lumps. 

Step Three: Add  the egg mix to the onoins and scramble. Serve with toast. 


Thursday 8 March 2012

Three ladies, a van, and a road trip to Bordeaux


I bought my petit maison in Segur le Chateau in 2007. Since this time, we’ve needed a sofa. However, there were a lot of priorities that slotted in ahead of the sofa: a kitchen, because there wasn’t one when we arrived; a new roof, because pieces of the old one kept falling off, and landing uncomfortably close to cars parked below; rebuilding the chimney; and a log fire, to keep us toasty through the winter months.

The list is likely longer than that, but they were the big ticket items. We’ve been slowly accumulating other pieces of furniture from local vide greniers and brocantes, but decent second hand sofas are difficult to come by. And of course we didn’t just need a sofa, we also needed a van to transport it in, as delivery times in France are lengthy, and some lovely friends to help me carry it in. When two friends Charlie and Vicky, mentioned they would be interested in driving their van to Bordeaux, as they also had some furniture requirements, I jumped at the chance.

So earlier this week we three ladies, set off for Bordeaux in a one tonne van. As Bordeaux is around 2.5 hours drive from us, and it was my first visit, we decided to make a night of it, staying at a small hotel on the edge of town. We arrived just as the sun begun to set and reflect light off the grand buildings constructed of sand coloured limestone. Strolling through the elegant pedestrian areas in the twilight, we admired the buildings, the sleek looking trams, and set about sampling the wines and food on offer. 


The highlight of the evening was Le Wine Bar, on Rue des Bahutiers. Not limiting themselves to the spoils of the Bordeaux vineyards, they serve a selection of wines from 26 countries, with the “lucky” 27th Morocco, being introduced soon. More impressive than the wine however, was the fabulous Italian fromage and bruschetta. We enjoyed buratta, fresh Italian mozzarella with cream, with tomatoes and rocket, olive oil and cracked black pepper, as well as tomato and garlic bruschetta. My first taste of  buratta was a highlight. The shell of the cheese was firm, giving way to a creamy panna as you cut into it. Fresh, rich, milky and perfect with tomato and rocket.


 Back home now, I'm busy constructing furniture, and dreaming of more buratta. Here’s some pictures, enjoy!


Saturday 3 March 2012

Happy Spring! Lemon and Ricotta Muffins Recipe


Spring is the time of plans and projects
Leo Tolstoy

It’s finally March! For us that means there are warmer, brighter, lovelier days ahead. And astronomically speaking, the beginning of Spring on 20 March. Thanks to a couple of unseasonably warm days earlier in the week, our Spring bulbs have made their move from their winter hiding places under the soil, straight up into the light above. The daffodils are flowering in our window boxes, ushering in the new season with their tall stems and smiley faces. 

Throughout March, according to my copy of Food For Free, we’ll be foraging for hop shoots, jack-by-the-hedge, morel, nettle, sweet violet and velvet shank. I’m looking forward to making nettle pesto, and bright green nettle pasta. I’m also hoping the tiny sweet violet plants in our courtyard and the hedgerows around Segur will flower, so that I can perhaps make some crystallised sweet violet flowers, as featured here. So pretty, and oh so fancy!   

But as well as foraging, March is the time to begin planting seedlings inside. At our house we’re focusing on stripy heirloom beets, basil, and red and yellow cherry tomatoes. In homage to the season ahead, and the bright light and excitement it brings, I made these lemon and ricotta muffins. The citrus zing and their yellowy colour reminds me of all the things I love about this time of year. I hope you like them. Here’s the recipe:

Recipe
(Makes 12 muffins)
2 cups plain flour
½ cup raw cane sugar
1 cup fresh ricotta cheese
1/3 cup milk
2 eggs
6 tablespoons butter
Zest of 2 large lemons
2 tea spoons baking powder
Two spoons fine white sugar (for sprinkling on top of the muffins)
½ tea spoon salt

Step One: Preheat the oven to 200C. Grease the muffin tin.

Step Two: Mix the dry ingredients (flour, cane sugar, baking powder and salt) in a large bowl.


Step Three: Mix the wet ingredients in a medium bowl. Whisk the ricotta, milk, melted butter, eggs and most of the lemon zest (holding some back to top the muffins).  

 
Step Four: In the large bowl, make a well in the dry ingredients, and pour in the wet. Stir gently until mixed. Pour the ingredients into the muffin tray. 


Step Five: Top each muffin with fine sugar and lemon zest. Bake for 20-25 minutes. When the muffins are done, the tops will be golden. Dip a fork in to one muffin to check. If it come comes out clean the muffins are cooked.  


Et voila, enjoy with tea in the sunshine!