Showing posts with label segur le chateau. Show all posts
Showing posts with label segur le chateau. Show all posts
Wednesday, 22 May 2013
Stay at our place in Segur



Thursday, 12 April 2012
Dandelion Syrup Recipe


Segur le Chateau sits in a deep valley, on the edge of the L’Auvezere. Approaching the village, from any direction, one drives through fields and fields, edged with deep green woodlands. The bright green fields are populated by Limousin cattle, a hefty caramel breed, prized for their quality beef. Among the fields and the wooded areas, are literally hundreds of apple orchards. In April, the apple trees lack leaves, but instead are adorned with delicate pink and white apple blossoms. The stout trees, standing in deliberate parallel rows, glistening in the sunshine, seem to be showing off their flowery jewels.
In April, many of the cattle fields are carpeted with dandelions. The green grass forms a background to the yellow seas of Spring. Entire fields are filled with these ubiquitous plants smiling at the sun with their bright yellow heads. The cattle lay contentedly among the flowers, presumably after goring on the flowery feast before them.
Because that’s the thing about dandelions, although often thought as a pretty pest, the entire plant is edible and very nutritious. According to an aromatherapy website (xxx), dandelions boast the following health benefits, they: improves gastrointestinal health; cleanses the skin and prevent acne; can prevent or lower high blood pressure; improve liver health; and help control or prevent diabetes.
So this is my first post using dandelions. Tomorrow I’ll be posting about dandelion pesto, but today, dandelion syrup, a dandelion flower sugar syrup that we’ve been adding to mineral water, but could be also added to white wine as a dandelion aperitif. I used a recipe I found at FX Cuisine.
Remember, when you are collecting dandelions, collect then from clean areas. Avoid the edges of roads, areas that may have been sprayed with pesticides, or used by dogs as a loo. Here’s the recipe, I hope you like it.
Recipe:
Dandelion heads (as many as you can find, I collected a small plastic bag full).
1Kg white sugar


Step One: Rinse your dandelions in a bowl of water. Pat them dry on paper towel. Then remove the stems, placing the petals in a large pot. There’s a technique to this. You could use a knife, but I found it more satisfying to grab the green stalk and twist it away from the petals.

Step Two: In a large pot bring 1L of water and your petals to the boil. Once it’s boiling remove from heat and let the flavour of the dandelions steep into the water overnight.
Step Three: Sieve the dandelions out of the water. Press the dandelions into the sieve to remove all of the water. Dispose of the petals.
Step Four: Return the water to the large pot, and dissolve in 950grams of sugar over a medium heat. Once the sugar is dissolved, let the syrup cool and then decant into glass bottles.

Do you have any dandelion recipes? If so, please do send them along. We have an endless supply of dandelions.
Tuesday, 10 April 2012
Beautiful Roasted Beets – Spring Salad Recipe

I came across some heirloom beets a few days ago and they were stunning! I bought two types. The first looked like a standard fuchsia beet on the outside, but slicing them exposed contrasting pink and white concentric rings. Delightful! The second, were bright orange-skinned, with yellow flesh.
I roasted both of them. Unfortunately the defined colours of the concentric rings dissolved somewhat in the roasting process, but they still tasted fabulous. According to some food writers you can avoid obliterating the lovely rings by steaming the beets as opposed to roasting.
The pink and white beets are defined by a sweet peppery flavour. The yellow-fleshed beets were sweeter again. I served them once they had cooled in a green salad, with bok choy flowers, salty sheeps feta, and an orange and poppy seed and pistachio nut dressing. A delicious combination!
I also held some of the beets back and mixed them into pasta dishes and added them to steamed greens over the following couple of days. Once roasted, the beets will keep for around a week in the fridge. Here’s the recipe, I hope you like it!

Recipe:
(Serves 2)
Three heirloom beets chopped into wedges (whichever you can find)
50 grams sheeps feta (crumbled)
Three handfuls salad leaves, I used a mixture of baby Spring greens including beets tops
Handful of bok choy flowers (if you can find them)
Handful roughly crushed pistachio nuts
Juice of one orange
Glug of olive oil
Two tea spoons of black poppy seeds
Salt and pepper
Step One: Roast your beets by placing them in a covered baking tray filled with water (to allow themto steam and roast), at 180C. They’ll take around 25 minutes, but you’ll know they are done when you can slice through them easily with a knife. Once they are cooked, drain the water the let them cool.

Step Two: Mix the dressing. In a small jug, squeeze the juice of your orange, add a glug of olive oil, a pinch of salt, the poppy seeds, and some ground black pepper. Shake it, or stir it and taste. It should be sweet and peppery.
Step Three: in a salad bowl place the greens, the bok choy flowers, the cooled beets, and crumbled feta and the crushed pistachios. Then pour over the dressing and mix with your hands, ensuring each leaf is coated with dressing.

Et voila! Serve and enjoy. And if you have any tips on cooking candy-striped beets and keeping the contrasting colours, I’d love to read them.
Saturday, 7 April 2012
A night at Chateau de la Motte

Driving from our flat in London, to our home in Segur is something Kritstoph and I imagine we enjoy, much more than we actually do. We talk about it for a week beforehand, what we need to take, the route we will follow through London, and ponder stopping somewhere fabulous for lunch en route. Without fail the reality is somewhat departed from our road trip ideal.
This time TomTom couldn’t find “a valid GPS signal” and as a result, we couldn’t find our way across the Thames. At 6am we found ourselves stuck circling the city, coming to a sudden halt as we drove into a fish market where delivery vans were busy unloading produce. We got ourselves stuck behind a forklift. We were attempting to beat the traffic we didn’t.
Upon arrival at the Channel Tunnel the check-in office explained politely that we’d missed our designated train at 6.38am and that we’d need to wait five hours for the next available one. We politely replied that we always miss our train, but that our ticket was valid for two hours. Apparently this is subject to availability – and it was Easter Thursday, the Channel Tunnels busiest day. Stunned we prepared to sit in the car for five hours, marvelling at our dumb luck and ignoring our stupidity. Eventually I hatched a revised plan, to break up our stay in the Loire.
I bought a copy of Alistair Sawday’s Go Slow France
 , and found Chateau de la Motte, at the southern edge of the Loire. And like weary travellers have done for around 600 years, we pulled in for the night, looking for a bed, and a hearty meal. The 15th century building was brought back to life 13 years ago by its gentile owners Marie-Andree and Jean-Marie. They’ve renovated, redecorated, planted gardens and orchards, and continue the small castles long tradition of welcoming guests, under the motto of “Castellum honesto numquan clauditur” (the door of this castle is never closed to an honest man).
During our evening with Marie-Andree and Jean-Marie we strolled around the medieval garden, admired the blossoming cherry trees, enjoyed aperitif in the light-filled salon, cracking home-grown nuts. This was followed by dinner “en famille” with our hosts and three Russian guests, listening with interest to Jean Marie’s potted history of the last 600 years at La Motte. For breakfast we tasted Marie-Andree’s preserves, and admired the gorgeous and ornate limestone fireplace which she carved for four hours a day over one winter, and Jean Marie’s fantastic aromatic wines.
Feeling cheerful and reinvigorated we got back in our car and headed confidently towards Segur... or so we thought. After around an hour we determined I’d been driving quite fast, but in the wrong direction. We turned around and took a slow drive home.


Monday, 2 April 2012
Picnic food – Vegetable and Feta Pie Recipe

Happy picnic season! Spring leaped quickly towards summer over the past week in London. In response, the parks were immediately filled with keen, white Brit’s bikini-clad or bare-chested, soaking up the available Vitamin D with abandon. We were caught slightly off-guard, wondering what to do with our last remaining bag of smokeless coal. Not the sort of thing that stores well, far too dusty for the hall cupboard.
But an excess of smokeless coal aside, all this sunshine means one thing to me – its picnic season. Long, lazy afternoons on my grandma’s old picnic rug await us over the next few months. These are my favourite days. With my head buried in a novel, or just staring at the cloud formations, and a wicker basket filled with fabulously tasty morsels and uncomplicated treats by my side. Simple pleasures... Sounds cliché? It probably is. For good reason though! Picnics are a relaxing and gentile way to be outside in nature.
During the long summer months in Segur we waste away the hours by the side of Lake Ruffiac, or Vigeous, eating bites of cheese, in between swimming back and forth across the lake. We set challenges, play games, forage for berries. Mid-afternoon someone usually hikes from our secluded place lakeside to the little shop selling ice-cream.
In honour of this sunny week in London Kristoph and I packed a picnic to share with a friend in the late Friday afternoon London sun. I dug out one of my favourite picnic recipes that made use of our last window box grown carrots and beetroots. The key to picnic food is that it tastes good when it’s been lying in the sun a while, can be packed in small containers and withstand a car ride. This pie meets those criteria and is also good straight from the oven, or reheated under the grill. I hope you like it as much as we do. Here’s the recipe:
Recipe:
300 grams shortcrust pastry
6 baby beets roasted and sliced thinly sliced (or one regular large beetroot)
6 baby carrots roasted and thinly sliced (or one regular large carrot)
3 handfuls of chopped purple sprouting broccoli
1.5 cup crumbled sheeps milk feta cheese
1 egg
Olive oil
Ground black pepper
300 grams shortcrust pastry
6 baby beets roasted and sliced thinly sliced (or one regular large beetroot)
6 baby carrots roasted and thinly sliced (or one regular large carrot)
3 handfuls of chopped purple sprouting broccoli
1.5 cup crumbled sheeps milk feta cheese
1 egg
Olive oil
Ground black pepper


Step One: Preheat the oven to 180C. Roast the whole baby carrots and beets for 30 minutes in a shallow covered dish filled with water (this ensure they remain moist).

Step Two: Roll the puff pastry and place on a greased baking tray. Score the edges. Arrange the carrot, beet and broccoli on the pastry base. Top with the broccoli and then the feta.

Step 3: Lightly beat the egg and wash the pastry edges with it. If there’s egg left over poor it evenly over the pie. Then pop it in the oven until the edges of the pie are golden, around 20 minutes.

What are your favourite picnic treats?
Saturday, 31 March 2012
Mousse au chocolat a l’orange recipe
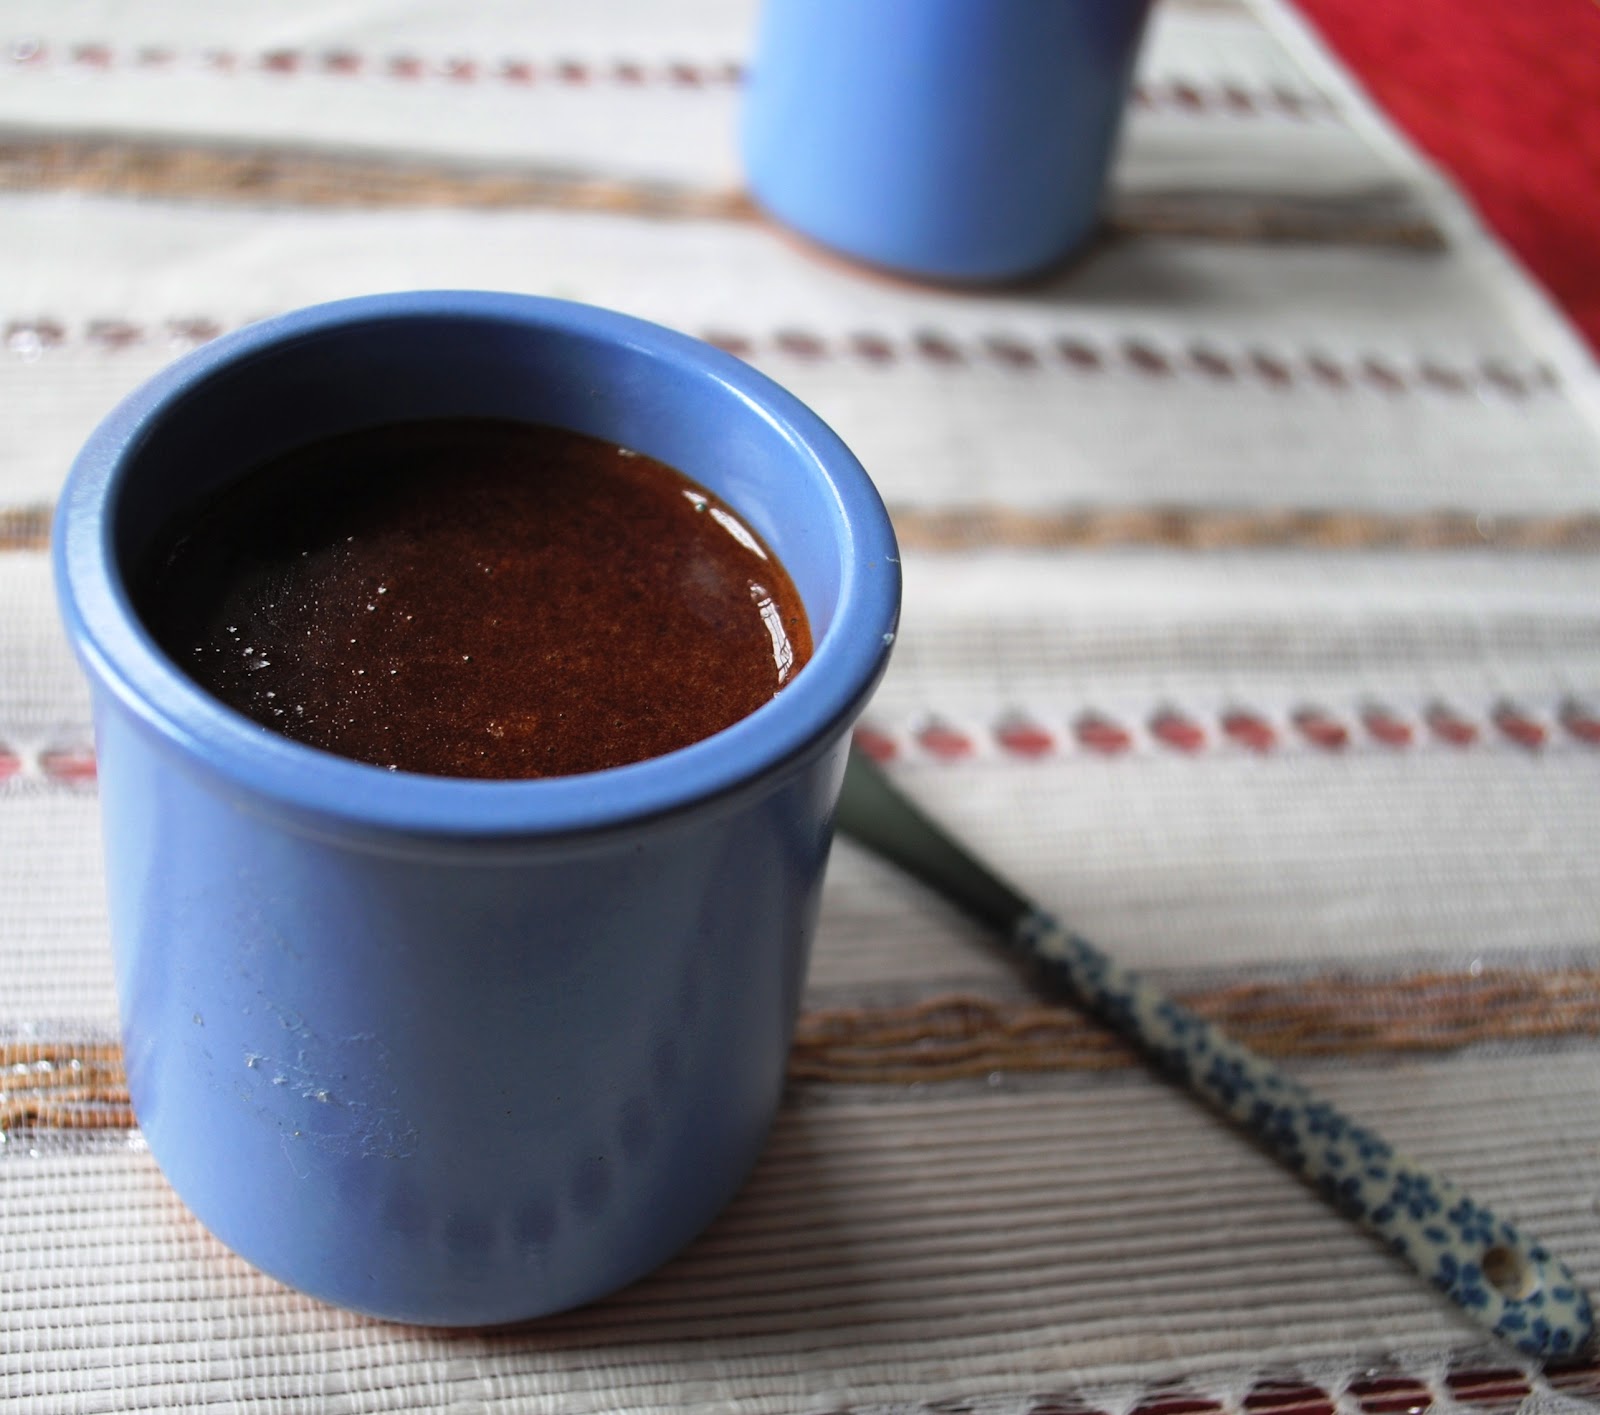
As a result of not consuming enough Swiss chocolate during my week in Geneva, I brought a substantial amount home in my suitcase. As a treat for Kristoph I used it to make an orange infused chocolate mousse.
Given this was my first attempt at making mousse, I thought I’d be wise to take my lessons from the masters.
So I followed one of David Lebovitz’ recipes, who adapted his recipe from Julia Child’s classic: Mastering the Art of French Cooking  .
.
Not desiring a boozy mousse, I left out the rum and instead infused the dark chocolate with an orange syrup which gave the mousse a lovely zesty zing.
. Not desiring a boozy mousse, I left out the rum and instead infused the dark chocolate with an orange syrup which gave the mousse a lovely zesty zing.
I made my mousse in small ceramic ramekins, in the vein hope of promoting portion control in our house. It didn’t work. Feel free to use any size ramekins you have. I’ve included below both the orange syrup recipe as well as the mousse. You’ll have some orange syrup left over. Decant into a small bottle or jar and keep in the fridge to add to soda water, or to mix with cocktails. You can also make the mousse without the orange syrup addition.
For the mousse keep in mind you’ll need three separate medium sized bowls. Make sure you have them before you start. Here’s the recipes.
Recipe:
(orange syrup)
Peel of one orange, cut into strips
¾ cup of sugar
2 cups of water

Step One: Boil the water in a pot. Once the water is boiling add the orange peel. Simmer for 20 minutes.

Step Two: Strain the orange peel, and return the liquid to the boil. Stir in the sugar until it dissolves.
Step Three: Remove from the heat, cool, and decant into a small bottle or jar.

Recipe:
180 grams dark chocolate chopped (at least 70% cocoa solids)
170 grams unsalted butter, cubed
60mL dark-brewed coffee
4 large eggs, separated
170 grams brown sugar
5 table spoons orange syrup
1 tablespoon water
Pinch salt
½ a vanilla pod

Step One: Melt the chocolate by making a double boiler. Ie Fill to 1/3 with water, a medium sized saucepan. Put a bowl on top and melt the chocolate and butter. Add the coffee and stir over a simmering heat until the mixture is smooth.

Step Two: In another bowl, whisk the egg yolks, 2/3 cup of sugar, orange syrup, and water, over the simmering saucepan, until the mixture reaches the consistency of runny mayonnaise.
Step Three: Remove the bowl from the heat and nest it in a bowl of ice water. Beat until cool and thick, then fold the chocolate mixture into the egg yolks.
Step Four: In another bowl, beat the egg whites together with the pinch of salt until they are frothy, and continue until they hold their shape. Add a tablespoon of sugar and the seeds of the vanilla pod. Continue to beat until the mixture is thick and shiny.

Step Five: Fold the beaten egg whites into the chocolate mixture until it is just incorporated. Do not over mix or the mousse will lose all of the volume you have created through beating and whipping.
Step Six: Transfer into a serving bowl, or ramekins and refrigerate until firm (around 4 hours).

Note – if you don’t eat it all after four hours, it will last up to four days.
Tuesday, 27 March 2012
Delicious Caramelised Onion Chutney Recipe

I’m back! Finally..... :) I’ve just returned from a busy week of meetings in Geneva. I meant to share this delicious onion chutney recipe while I was away, but alas I was distracted by all things Spring-like and gorgeous surrounding Lac Léman. Think chirping birds. Picture clear views of the French Alps beyond, blossoming Magnolia trees (which always stop me dead in my tracks), thousands of pert daffodils, green grassy carpets dotted with jewell-coloured crocuses, and all this while the cafe at Bain des Paquis still considers it fondue season!
Some evenings there really is nothing better than melted cheese, bread, mint tea, and good conversation in the middle of the lake. This onion chutney may not give you that warm “cheese ball in the stomach” feeling that fondue does, but it’s a whole lot healthier. It’s rich, but you only need a little, and it works with nearly everything. We’ve been smearing it on crackers with soft and hard cheeses, topping salads and wafer thin pizza bases with it, adding a little extra flavour to steamed greens, and to be honest we’re nearly out of it. Down to the final tasty morsels of our last jar, three jars was nowhere near enough.
So if you’ve got the onions, and the gumption for chopping them, I’d recommend doubling or even tripling this recipe. This is very simple recipe, and once bottled in labelled jars makes a great gift, that is, if you don’t eat it all first. Here’s the recipe, it makes three small jars.
Recipe:
8 medium sized onions sliced
1 ½ cups brown sugar
1 cup apple cider vinegar
½ cup balsamic vinegar
20 peppercorns (any colour/type) ground
3 table spoons wholegrain mustard
Dash olive oil
Step 1: In a preserving pan, or large heavy bottomed pot, heat a dash of olive oil and then add the onions. Brown them slowly over a medium heat.

Step 2: Add the sugar, mustard, ground peppercorns, and the vinegars. Bring to the boil, then turn down and simmer for 90 minutes.

Step 3: Remove from heat and spoon into sterilised jars, seal and label. Et voila, enjoy!

And here's a couple more pics from Geneva!


Thursday, 15 March 2012
Kale and caramelized onion recipe

Warning: this is another super healthy post from Segur. This dish is delicious, I promise, but I realise I’ve posted two very green and healthy dishes sequentially, and for some of you that might be a little too much. So if you are looking for a sweet treat instead, perhaps try these blondies, or these muffins. But, if you fancy a hearty, simple earthy dish, with creamy and sweet elements, then this might just be for you.
So, a little background on this post - I’ve had a couple of kilograms of brown onions sitting in our kitchen for the last few weeks. I’ve been meaning to make caramelized onion chutney, to continue my preserving experiments, with my new preserving pan. But as is often the way, I seem to be continually distracted by other projects and activities. But I decided today was the day and the chutney, which I’ll post about in the next couple of days. Once it's finished simmering away, and slowly reducing on the stove.
As I was caramelizing onions anyway, I decided to put together a healthy lunch using some of the onions and a bunch of organic kale, which has been sitting in the fridge for a few days. I often steam kale, and toss it with soy, garlic and ginger. But today I thought I’d honour its Tuscan roots and go for a slightly richer dish. I added a couple of handfuls of chopped kale to oil in the frying pan and tossed it around a little. I then dropped in a couple of tablespoons of the caramelized onions and fried it off a little further, allowing the kale to soften and morph into an even brighter green. I added a little Turkish feta that was in the fridge, which finished the dish off with a rich creamy, slightly salty kick.
This is a really simple dish, and makes a fantastic midweek lunch. It would also be lovely served as a side dish, for dinner. You can also caramelize additional onions and they’ll keep in the fridge for at least a week. They are great on pizzas, or stirred into pasta. Here’s the recipe:
Recipe
(Serves one, scale up as required)
One onion (sliced)
Two large handfuls roughly chopped kale (any variety will do)
Dash of balsamic vinegar
30 grams feta, or any hard, crumbly cheese (a hard goat would also work)
Olive oil
Step One: Add the sliced onion to a pan, with a dash of oil. Move the onion around with a wooden spoon, allowing it to cook through and caramelize. After a few minutes add a dash of balsamic vinegar to the onion and fry it off a little more. You know the onion is caramelized when the colour has darkened. Set aside.


Step Two: Heat a dash of olive oil in a pan. Drop in the kale and toss. The colour will intensify quite quickly. When it does, stir through the onion, and toss again. Remove from heat, and crumble in the feta to serve. Enjoy!

Sunday, 11 March 2012
Five-minute white chocolate and cranberry blondie recipe

I preface this post about quick-to-make blondies, with the statement: I love slow food. And I am committed to bringing more slow food into my life. But yesterday was not a day for slow food. The sun was shining and I wanted to take advantage of that fully, and, slowly. I spent my day watching old French men trundle past my kitchen window, in waders, carrying fishing poles, and small leather fish purses. This procession of khaki attire marked the opening of the fishing season.
I followed them to the bridge and watched them cast their lines in the river. Standing, patiently for hours, the scene was reminiscent of the film a River Runs Through, sans the young, fresh-faced Brad Pitt. In the stunning film, fly fishing is not officially a religion, but it is a serious spiritual path for certain men. I stood on the bridge near the old mill, and watched the eight French men standing quietly in different parts of the shallow river, waiting patiently for trout. The trout weren’t rising, but the men appeared happy enough, pointing their crinkled noses up, and squiting towards the bright mid-morning sunshine.
I followed them to the bridge and watched them cast their lines in the river. Standing, patiently for hours, the scene was reminiscent of the film a River Runs Through, sans the young, fresh-faced Brad Pitt. In the stunning film, fly fishing is not officially a religion, but it is a serious spiritual path for certain men. I stood on the bridge near the old mill, and watched the eight French men standing quietly in different parts of the shallow river, waiting patiently for trout. The trout weren’t rising, but the men appeared happy enough, pointing their crinkled noses up, and squiting towards the bright mid-morning sunshine.
Returning home I got to thinking about baking a quick snack. My friend across the river, the Comptesse, who I wrote about here, makes blondies. Like her salad dressing, the blondies are much praised, and also like her salad dressing, the recipe remains a guarded secret. But I had a hunch blondies could be a one bowl event, such is the Comptesse’s preference for simple foods. She prefers to spend her days outside answering the call of her extensive garden, and stores mail in her oven.
I found this at Simply Recipes. I used this as a base, but made a few tweaks. These sweet treats are incredibly quick and simple to make, and the result is sweet and chewy. As I assumed, all of the ingredients can be mixed into one large bowl with the help of a whisk and a spatula. There’s absolutely nothing fancy (or particularly healthy) about them. They are quick to mix, take 20 minutes to bake, and taste delicious. I added dried cranberries and white chocolate, which provide a contrasting sweetness and tartness to the blondie, not to mention jewel-like bright fuscia inclusions – I do love colourful food. You could also experiment with any combination of nuts, dried fruit, or chocolate.
Recipe
1 and 1/2 cups of all-purpose flour
1/2 cup of melted butter, melted
1 cup of dark brown sugar
1/2 cup of chopped white chocolate
2/3 cup dried cranberries
1 egg
1 vanilla pod
1/2 teaspoon baking powder
Pinch of salt
Step One: Preheat the oven to 180C. Lightly butter the pan. I used individual tins, but you could use a medium size tin.
Step Two: Whisk together the melted butter and sugar in a large bowl. Then add the egg and the contents of the vanilla pod. Continue whisking.
Step Three: Add the sifted flour, baking soda, baking powder, and salt, mix it all together. Add the cranberries and chopped white chocolate.
Step Four: Pour into the pan, or muffin tin. Bake for 20 minutes, or until a toothpick comes out clean. Allow to cool before serving.

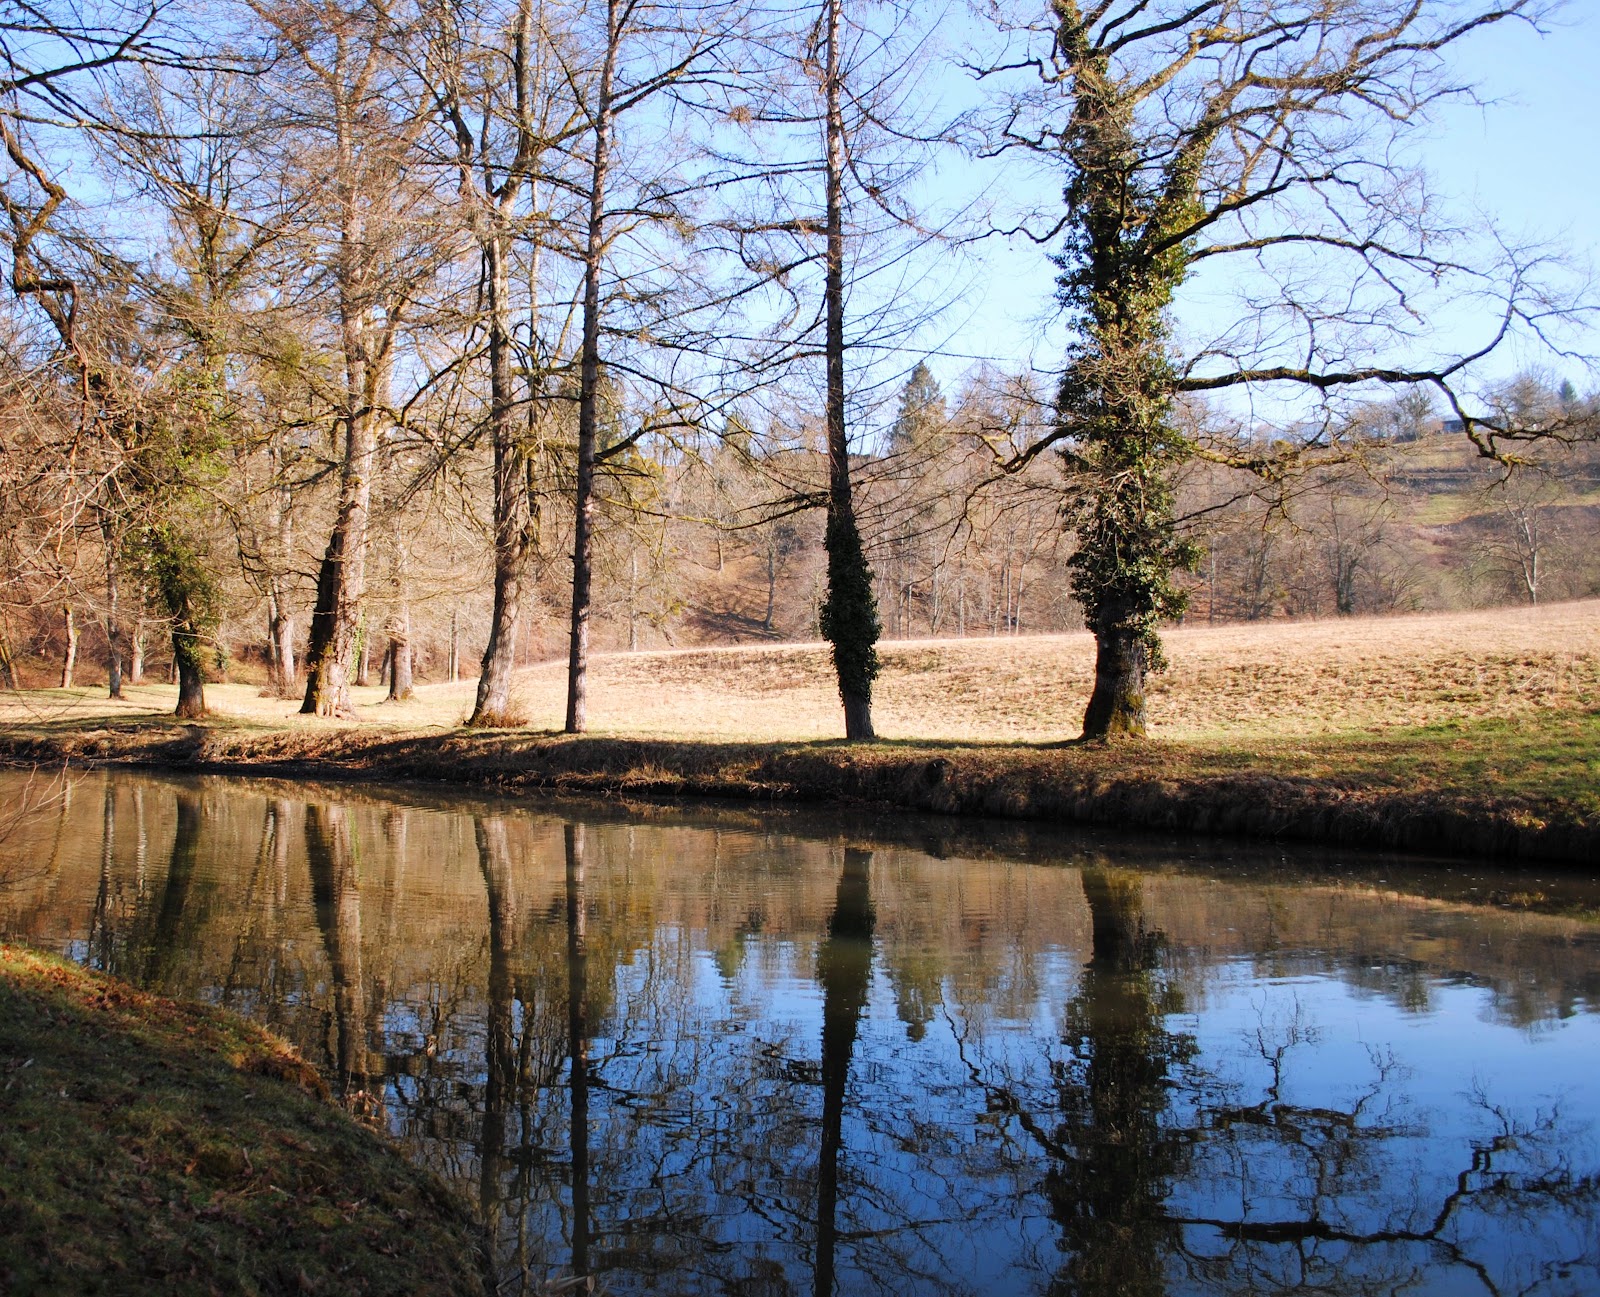
And here's a couple of pictures of the trout fisherman and the river yesterday. Enjoy!


Thursday, 8 March 2012
Three ladies, a van, and a road trip to Bordeaux

I bought my petit maison in Segur le Chateau in 2007. Since this time, we’ve needed a sofa. However, there were a lot of priorities that slotted in ahead of the sofa: a kitchen, because there wasn’t one when we arrived; a new roof, because pieces of the old one kept falling off, and landing uncomfortably close to cars parked below; rebuilding the chimney; and a log fire, to keep us toasty through the winter months.
The list is likely longer than that, but they were the big ticket items. We’ve been slowly accumulating other pieces of furniture from local vide greniers and brocantes, but decent second hand sofas are difficult to come by. And of course we didn’t just need a sofa, we also needed a van to transport it in, as delivery times in France are lengthy, and some lovely friends to help me carry it in. When two friends Charlie and Vicky, mentioned they would be interested in driving their van to Bordeaux, as they also had some furniture requirements, I jumped at the chance.
So earlier this week we three ladies, set off for Bordeaux in a one tonne van. As Bordeaux is around 2.5 hours drive from us, and it was my first visit, we decided to make a night of it, staying at a small hotel on the edge of town. We arrived just as the sun begun to set and reflect light off the grand buildings constructed of sand coloured limestone. Strolling through the elegant pedestrian areas in the twilight, we admired the buildings, the sleek looking trams, and set about sampling the wines and food on offer.

The highlight of the evening was Le Wine Bar, on Rue des Bahutiers. Not limiting themselves to the spoils of the Bordeaux vineyards, they serve a selection of wines from 26 countries, with the “lucky” 27th Morocco, being introduced soon. More impressive than the wine however, was the fabulous Italian fromage and bruschetta. We enjoyed buratta, fresh Italian mozzarella with cream, with tomatoes and rocket, olive oil and cracked black pepper, as well as tomato and garlic bruschetta. My first taste of buratta was a highlight. The shell of the cheese was firm, giving way to a creamy panna as you cut into it. Fresh, rich, milky and perfect with tomato and rocket.


Back home now, I'm busy constructing furniture, and dreaming of more buratta. Here’s some pictures, enjoy!
Subscribe to:
Posts (Atom)