Showing posts with label foraging. Show all posts

Friday, 20 April 2012

Dandelion pesto recipe


Our little Segurian courtyard is filled with dandelions, no flowers yet, just the lovely little leaves. Usually I weed the courtyard, making way for the bright green moss that I love. It grows in the shade underneath the dandelions and sparkles in the sunlight when exposed. 

This week however, I decided to do a little reading on the ever present dandelion greens. It turns out dandelion greens are very nutritious. They have concentrations of beta-carotene than carrots, and more iron and calcium than spinach. By eating, as opposed to composting this ubiquitous little weed, you also get vitamins B-1, B-2, B-5, B-6, B-12, C, E, P, and D, biotin, inositol, potassium, phosphorus, magnesium, and zinc.

Worth a try I guess! Apparently the term dandelion comes from the old French of “dent-de-lion” lions tooth, after the saw-toothed shape of the dandelion leaf. I picked a couple of large handfuls of the smaller leaves – these are less bitter that the larger leaves, and set about making pesto. The pesto was quite bitter, but still made a tastier dip than anything store bought, and was especially good smeared in the base of vegetable tarts, and mixed with a little cream fraiche in pasta dishes.

Dandelion leaves are tougher than basil leaves, which can be mixed nicely into pesto by chopping and then pummelling with a mortar and pestle. I used a hand blender to chop and blend the leaves together. If you use a hand blender be aware that leaves may collect in the blade. This happened to me and I (incredibly stupidly) attempted to free them, blending my finger as a result... a quick, painful trip to the pharmacie ensued. If you do need to clear the blade be sure to turn the power off.

Here’s the recipe, I hope you like it.


Recipe:
Three handfuls of young washed and chopped dandelion leaves
Half a cup grated parmesan cheese
!/4 cup olive oil
Sea salt

Step One: In a large mixing bowl place the dandelion leaves, parmesan cheese and half of the olive oil. Mix with a hand blender. This will take a while as the leaves are slightly tough. Slowly add the remainder of the olive oil and salt to taste. The finished consistency should be smooth and bright green.  


Sunday, 1 January 2012

Happy 2012 from Segur le Chateau


 Happy New Year everyone!

Today’s been a slow day in our household. Our house is in a mess, and we’ve not yet found time to take down the Christmas tree. But after a late night out, most of Sunday was spent in our lounge room with friends drinking tea and reading the papers. We made lists of 2011 highlights (getting married to Kristoph), hilarious moments (a certain incident involving a thieving monkey, a flip flop, and a Balinese temple), and cringe-worthy experiences (which will remain unshared...).  

2011 was a significant year for Kristoph and I. We were lucky enough to invite friends and family from all over the world to Segur le Chateau, and to share with them the way we live. In an effort to immerse them into our French way of life, we asked many of them to climb cherry trees for dessert, and others to forage for wild strawberries and mint to add to Pimms. We sent them off to the daily produce markets in surrounding towns, with instructions to try everything and bring back the tastiest delights they could find, to share with others.

Their enthusiasm for Segur, the cuisine, the life-style, as well as for our wedding celebration was incredibly touching to both Kristoph and I, leaving us with smiles that are yet to fade. This experience inspired me to dedicate more time to this blog, to share with a wider audience the foods we forage and feast on.    

So as we welcome 2012, thanks for your support and encouragement so far. It heartens me to read your comments and receive your emails. This January, I’m looking forward to foraging for chickweed, velvet shanks, and oyster mushrooms.  

I’m also looking forward to eating a little cleaner than in December. You may have noticed the dominance of Christmas treats in December, with spiced Xmas bark, pine nut and rosemary brittle, and mince pies all featuring. While most of these goodies were given away as gifts, and served at parties, both Kristoph and I have certainly enjoyed a sufficiency of festive season over-indulgence. In January I’ll be bringing you more cleansing dishes, interspersed with treats.

Please feel free to send me a note with comments, or requests. Wishing you a fabulous 2012, with your plates filled with fabulous seasonal food, foraged finds, and plenaty of time for idle pursuits!

Monday, 5 December 2011

A foraged Christmas Wreath


Christmas fever has over-taken our home. Kristoph has been getting around in his festive jumper, complete with snowflakes and stars, since December 1. He wore it to a production meeting a few days ago, apparently to cheer everyone up a little.

The fire is roaring, the air is crisp, and it’s really best to be inside by 5pm, at which time a blanket of dark quickly envelopes the sky. Its thin pickings for food foraging in our local woods this December, with only a few fungi specimen, here and there. The squirrels have taken to the trees, and can be seen frantically searching for the acorns they know they stashed somewhere... safely!

Despite the dearth of edible goods, over the weekend we discovered an abundance of forgeable Christmas decorations. And while traipsing through the woods, admiring the holly, and the ivy, and the drooping conifers, I was inspired to create my own Christmas wreath, from foraged finds.

We collected pieces of ivy, holly and drooping conifers, and bought a twisted grapevine wreath base from a local florist. Other than that, all that I used was some florist wire, and pinecones and other decorations from our “Christmas box.”

Here’s how I made the wreath:

1. Collect your materials: ivy, holly, pine-cones, droopy conifers, whatever pleases you, and a wreath base.


2. Weave the droopy conifer though the wreath base, keeping the direction consistent. Wrap the ivy around the wreath and fasten with florist wire.


3. Add the holy pieces and decorations, fastening them with florist wire.  


4. Et voila, your wreath is finished. Hang it in your desired location and admire your foraged craftiness!


Tuesday, 1 November 2011

Happy November foraging!

According to my mini (field guide) version of Richard Mabey’s Food For Free, there are plenty of fungi and nuts, as well as a few other goodies to forage for in November.

Here’s a quick run-down, lifted directly from Food For Free: 
   
Blewitt
Cauliflower fungus
Cep (one of my favourites...)
Chanterelle (another of my favourites...)
Chickweed
Happy November foraging!
Fairy-ring champignon
Field mushroom
Giant puffball
Hazelnut
Hedgehog fungus
Honey fungus
Horse mushroom
Jew’s ear
Oyster mushroom
Rosehip
Saffron milk cap
Shaggy cap
Sweet chestnut (just foraged some of these!!)
Velvet shanks
Walnuts


Remember leave plenty for the woods and hedgerow dwellers and take only what you can, and will eat.

Be careful with fungi –if you are in France you can check with any pharmacist on if your foraged fungi are edible if not.

Has Food for Free missed something? If so, please let me know? I’d love to read what other goodies you are foraging!   

Happy November foraging!
 Above: the path to the chestnut wood, behind Segur le Chateau, France.


Saturday, 29 October 2011

Damson bread and butter pudding


I had no idea what a damson was until September this year. This ancient and sour plum does not grow in Australia, so I was thrilled when friend’s Randolph and Lalu showed me their damson tree a few weeks ago. That was a big foraging weekend, so the damsons went straight into the freezer, until I figured out what to do with them. 


According to my recently purchased copy of Forgotten Fruits, by Christopher Stocks, damsons likely originated close to the the Syrian city of Damascus. Damsons are too sour to eat raw and therefore often used in cooking and jam making. Historically the juice was also used by the textile industry.

A quick internet search indicates damsons can be used to make damson gin, vodka and beer, and to make jam. But it was a recipe for damson bread and butter pudding that caught my eye. Bread and butter pudding is one of Kristoph’s favourite desserts, so this damson version was potentially a household hit.  

I modified the recipe slightly, here’s my version.

Recipe
100g butter
8 thin slices white loaf, crusts removed
150g fresh or frozen damsons (I used frozen and thawed them over night)
3 eggs
3 egg yolks
1 vanilla pod
200g caster sugar
400ml single cream

Step 1: Grease and sugar a six-inch by four-inch ovenproof dish.

Step 2: Butter each slice of bread. Cut each in half to make triangles.

Step 3: Remove the damson stones.


Step 4: Layer with the bread, a good sprinkling of sugar, damsons, bread, sugar damsons, etc, until the bread, the damsons, and half of the sugar, are used up. Sprinkle the top with sugar.

Step 5: Beat the eggs, egg yolks, vanilla and remaining caster sugar in a bowl. Heat the cream to just before boiling. Pour it over the eggy mixture and stir gently.


Step 6: Pour the eggy mixture over the pudding, and leave to stand for 30 minutes. Preheat the oven to 180C/350F.

 
Step 7: Place the pudding dish in a baking dish filled with water. Cook for 40 minutes until the custard sets.

Serve this warm with cream, or Greek yoghurt. According to Kristoph the damsons are tastier than the usual sultanas in bread and butter pudding. Enjoy!

Do you have any great damson recipes? If so, please leave them in the comments box. I’d love to try them.

Sunday, 23 October 2011

Cocktail hour - berry infusion


Over the last year or so I’ve reintroduced cocktail hour. When I want to morph into an old French man, I opt for a Ricard over ice, with a dash of water. I put my feet up, grab a deckchair and lounge in the courtyard, and dream the day away.

I don’t always want to feel like an old French man though. On other evenings I lean towards our house cocktail, more of a ladies drink really, a combination of a dryish Alsace Riesling and a dash of locally made raspberry liqueur.

Recently however, I’ve been craving an aperitif with a heavy burst of vitamin C, to both recharge and relax. It’s on these days that I scour the fridge and freezer for foraged berries. I tip them all into a glass and use a hand blender to puree them. While that’s happening I add a shot of Icelandic vodka, apparently distilled through basalt, and a little more ice.

The result – a slightly naughty version of a very healthy juice!         

Bon weekend!


Tuesday, 4 October 2011

Tangy Apple and Blackberry Muffins

I’ve been feeling a bit overwhelmed by the volume of apples currently smiling up at me from our dining room table. Perhaps it’s a bit of forager’s guilt... 

Did we collect too many? More than we can eat? How many apples do two people really need?

So today I made another effort to use up our collection of wind-fallen apples, by making apple and blackberry muffins. Our local blackberry bramble is still ripening, so we pop over every couple of days to collect another lot. We never seem to have too many blackberries.   


Back to the muffins. A quick search online indicated that recipes for twelve muffins often contain a cup of vegetable oil. I’m just not interested in consuming vegetable oil. So the following recipe is a melange of several I found online substituting ingredients in and out. 

The result, a sweet muffin offset by the tangy apples and blackberries. Delicious warm or cold! 

Recipe
300grams plain flour
1 tablespoon baking powder
1 egg
Pinch of salt
190grams brown sugar
230ml butter milk
100grams melted butter
250grams bramley apples (chopped into 1cm chunks)
150grams blackberries

Step 1: Preheat the oven to 180C. Sift the flour and baking powder into a mixing bowl. Stir in the sugar and salt.

Step 2: Beat the egg, butter milk, butter.

Step 3: Stir the wet mixture into the flour mixture with a big wooden spoon. Drag it round slowly, making sure the ingredients are well mixed. Then drop in the apple pieces and blackberries and stir again.The mixture will change colour from cream to purple. Very satisfying.


Step 4: Spoon mixture into a muffin tray, lined with baking paper, or paper cases. 


Step 5: Bake for 20-25 minutes, until the tops are golden brown.Let them cool for a few minutes and eat the first one warm!


Sunday, 2 October 2011

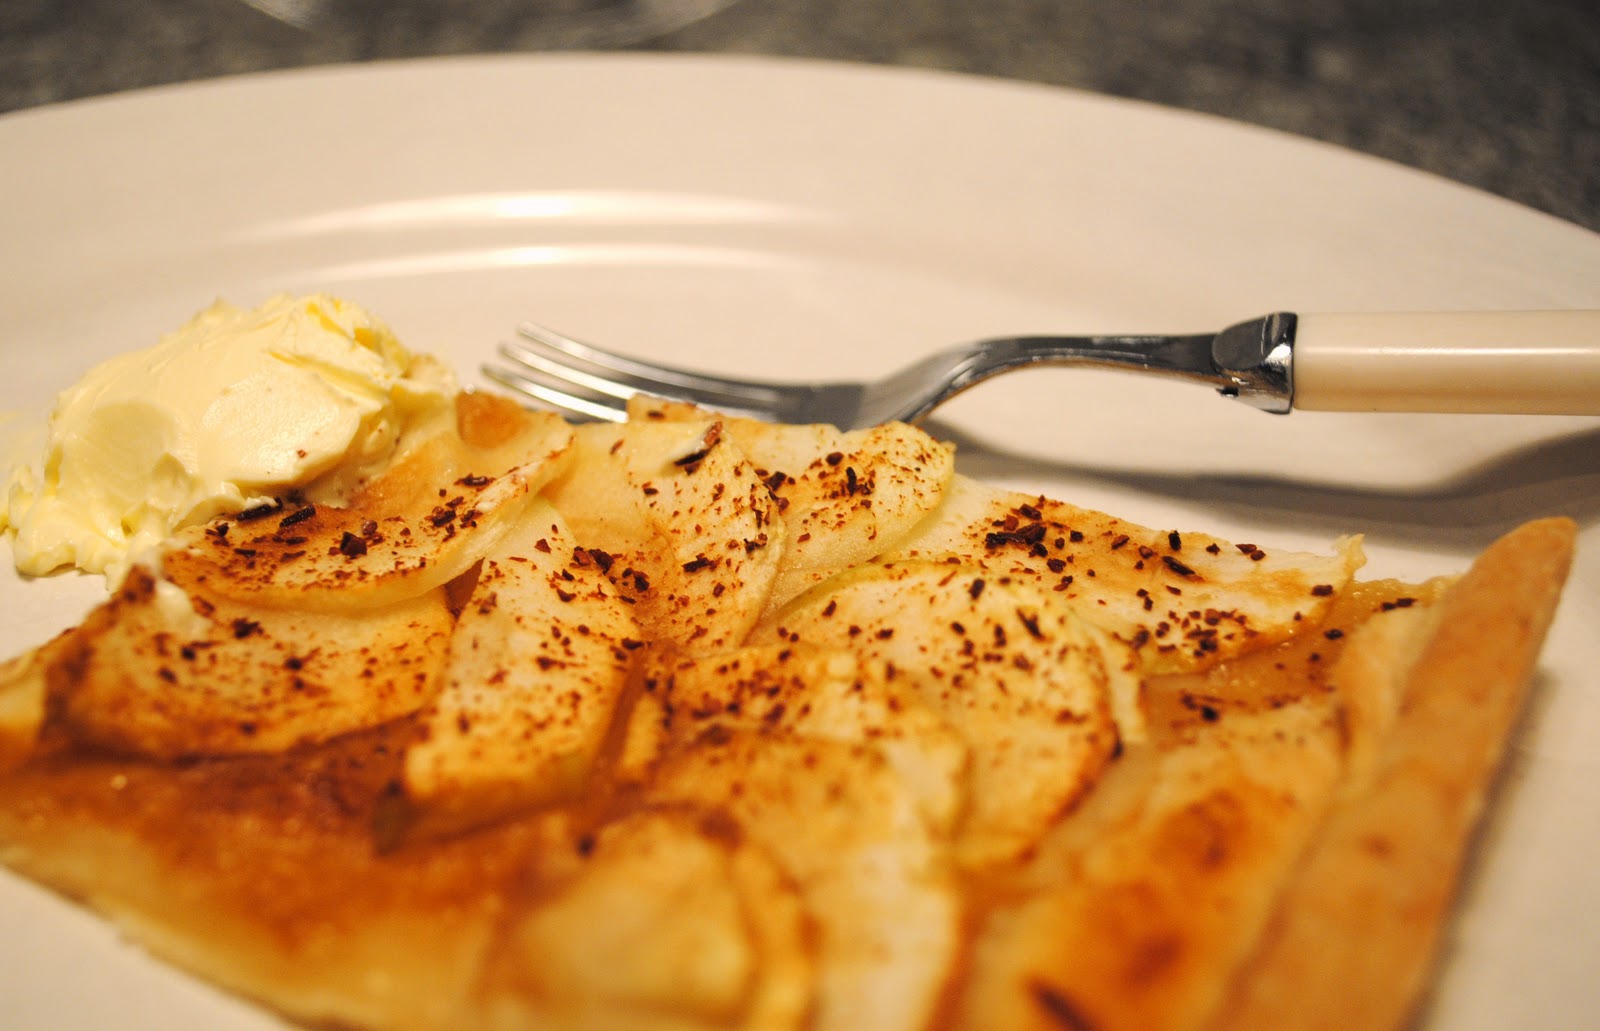
Four Step Rustic Apple Tarte Tatin

In our household we remain slightly over-crowded by apples collected during last weekend’s forage. I’ve been stewing them throughout the week. Today I noticed a roll of short-crust pastry in the fridge that needed to be used, and opted instead for a rustic tarte tatin.

For this recipe I skipped the fancy possible addition of frangipane, delicious as it is. As the apples are flavoursome and fresh, I concluded they should stand on their own. I also omitted the apricot jam glazed used in most French recipes for tarte tatin, sticking instead with fresh ground cinnamon and dark muscavado sugar, to flavour and slightly sweeten the apples.

This tart was constructed in less than 15 minutes, and has just four very simple steps.

The result, according to Kristoph, was "very tasty." A perfect dish to serve with afternoon tea, or as a quick dinner party dessert. It will serve 6 people.  


Recipe
5 green sour apples, peeled, cored and sliced thinly
1 pack 375gram shortcrust pastry
1 Cinnamon stick, ground
1 lemon
3 tablespoons dark muscavado sugar
Flour (for rolling the pastry)

Step 1. Start by rolling the pastry into the shape of your baking tray (I used a tray approximately 30cm x 20cm). Cover the tray in baking paper, and lay the pastry on top.


Step 2.  Slice the apples and soak then in the lemon juice. Once soaked add two tablespoons of the sugar and mix thoroughly through, with your hands.

Step 3. Arrange the apples. Start in the centre and work out in a circular shape. Most French tarts look perfect, but we’re making a rustic tart, so don’t be too precious. Then sprinkle the cinnamon over the top, together with the remaining sugar.


Step 4. Cook the tart at 180C. It will likely take between 20-25 minutes, depending on your oven. You’ll know it’s ready when the pastry is golden, and your kitchen is smelling of delicious cinnamon and baked apple.  


If you make this, please do write and tell me what you think, how you change it, and how it turns out!

Wednesday, 28 September 2011

Super simple blackberry and goats cheese salad

We’ve still got loads of blackberries ripe and ready for picking in our area, and also plenty of berries yet to ripen. Over the last few weeks I’ve been picking, cooking, serving blackberries in drinks and desserts.

For last night’s dinner party, I decided to promote the blackberries from to dessert to part of the main course. This was also driven in part, by the fact we’ve got a huge bowl of Bramley apples to use up, so a French apple pie was the preferred dessert option. 


I experimented with a blackberry and goats cheese salad, dressed with a pomegranate molasses, olive oil and black pepper. The salad was super quick, taking less than five minutes to put together. It was very well received by our guests, who expressed initial surprise at blackberries in the salad, but concluded that soft goats cheese and blackberries actually form a very good partnership.  Here’s the recipe.

Recipe
Four cups mixed baby salad leaves
Half a cup blackberries
50grams soft goats cheese
Slug of pomegranate molasses
Two slugs of olive oil
Ground black pepper

Mix together in a salad bowl the salad leaves and blackberries. Crumble the soft goats cheese over the top. For the dressing, mix the olive oil, pomegranate molasses and ground black pepper in a small jar. Shake it up, taste, and when you’re happy with the sweet, rich, peppery flavour, pour it over the salad to serve. Et voila! 


Tuesday, 20 September 2011

Brilliant blackberry and chilli syrup

It’s hard to walk past a hedgerow at this time of year without noticing leaves tinged with jewel-hued spheres of green, red and purple. Its blackberry season! Readily available in fruit stores and supermarkets everywhere, it can be much more satisfying, and if you take some enthusiastic friends, a whole lot more fun, to collect your own
.


A versatile fruit, excellent eaten raw with pancakes, or in a crumble like we also enjoyed (below), there are no shortage of options.


As well as the crumble, which was devoured by myself and a bunch of friends, I wanted to experiment with a slightly longer-lasting blackberry recipe. After an online read around, I decided to experiment with a blackberry and chilli syrup, like the one made by Heidi Swan.

This simple and quick syrup, is rich in flavour, with a slow and firey burn that creeps in at the end of each mouthful.  Heidi suggests swirling into yogurt, oatmeal, and crème fraîche, or on toast, over goats cheese, or pancakes. All delicious options!

At our place it’s been eaten as a late night snack on crackers, added to champagne for a brilliantly sparkly aperitif, and spread on toast topped with blue cheese. The omnivore in our family has also suggested the syrup would be excellent with game – he’s mentioned venison and pheasant. 

Here’s the recipe, slightly adapted from Heidi’s version:

Recipe
(Makes around 500mL)
    3 tea spoons dried crushed chillies
    1 cup dark Muscovado sugar
    1 cup organic brown sugar
    1 1/2 cups water
    Juice of one large lemon
    1 cup blackberries

 Add the dried chillies, sugars, water, and lemon juice to a medium saucepan. Bring the mixture to a boil over medium heat. Boil, stirring regularly, until the mixture has reduced to 2 cups. This should take around 25 minutes. 

While that’s boiling, puree the blackberries with a hand blender. Strain the berries through a fine-mesh strainer, and set puree aside.

Head back to the stovetop, once the chilli mixture has reduced, remove from heat. Add to the berry mixture and blend until smooth. Strain through a sieve into a heat-proof bowl.

Pour into a bottle and refrigerate. Enjoy!!